
Below is an example of how NOT to build a 928 engine..... it lasted less than 5000 miles.
The stock 32 valve, quad overhead cam engine was bored and stroked from 5 liters to 6.4 liters, or 394 cubic inches. I removed and disassembled the engine, and delivered it to Norwood Performance of Dallas. I supplied the stroker crankshaft, and the following pictures and text recount the process to put it all back together. James Patterson of Norwood Performance assembled the short block, as well as all of the component selection and specifying the machine work & sleeving.
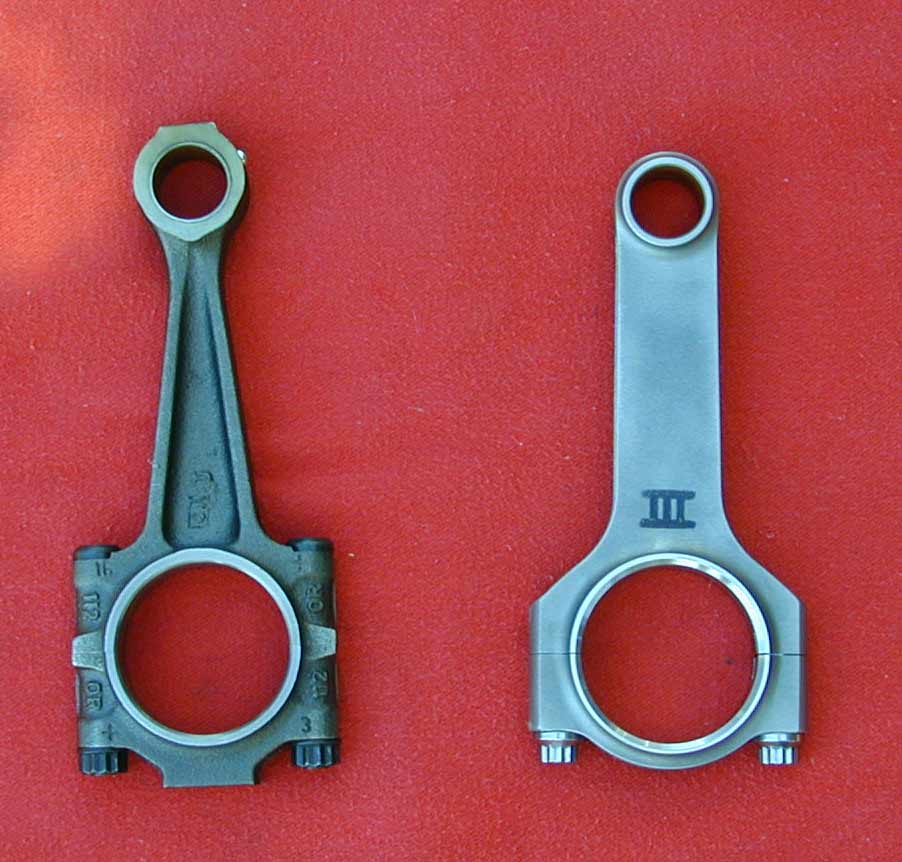
Here is a comparison of the stock components to the new ones.
Stock JE
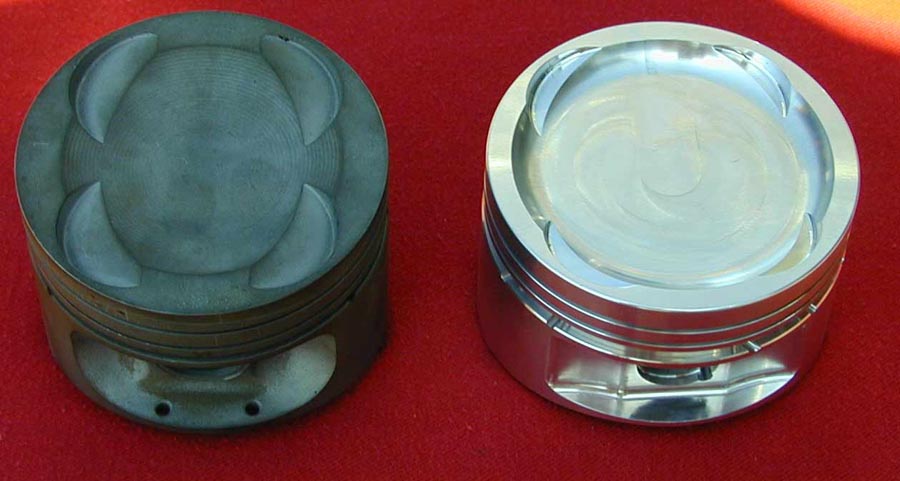
Stock Ferrera.
The first step was to "grout" the block. (below) When the 928 engine was developed it was thought that the larger the water jacket around the cylinder walls the better. In recent years, Porsche found that the heat was mostly generated at the top 3 inches of the cylinders. In 1991 when the 968 engine was designed, the water jacket around the cylinder walls was only 3 inches deep! That was almost half of the 928 water jacket depth. So, in the interest of block integrity, I tilted the block so that one bank of the cylinders was level, (checked with a digital level) I mixed the grout, and poured it in about an inch deep in the bottom of the water jacket. Unfortunately this filled the drain plugs for the coolant on both sides of the block. When it hardened, it was almost as hard as the block itself. The grout was designed specifically for this purpose, and has been used in many engines in race and street applications. The following Saturday I did the other side.
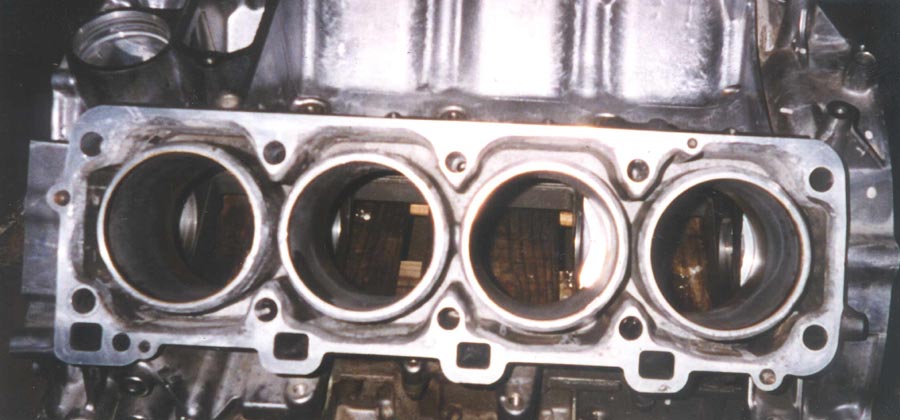
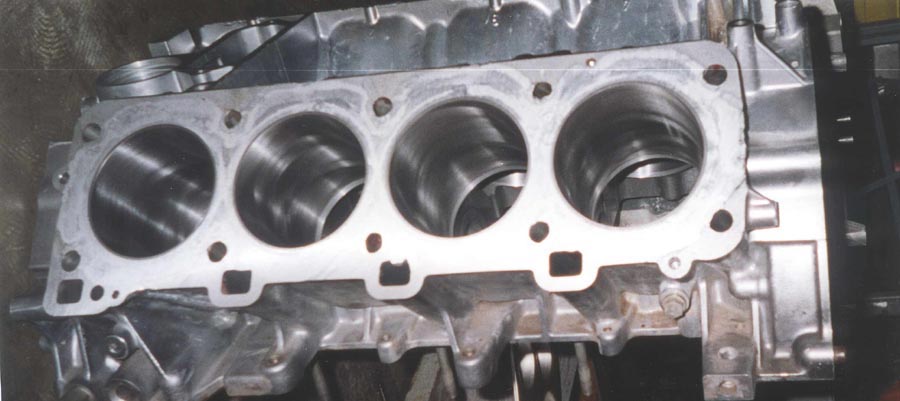
If you look closely, I also took a die grinder, and ground a beveled edge along the outsides of the cylinder walls, and also the inside rim of where the block and head meet. This is so the welder could get 100% penetration when welding in the deck plates shown below. The deck plates were also beveled on all edges, forming a V for the welder to fill. The plate was cut from T6 Aluminum and fits loosely only protruding the deck face by 1/16th of an inch, as seen below.

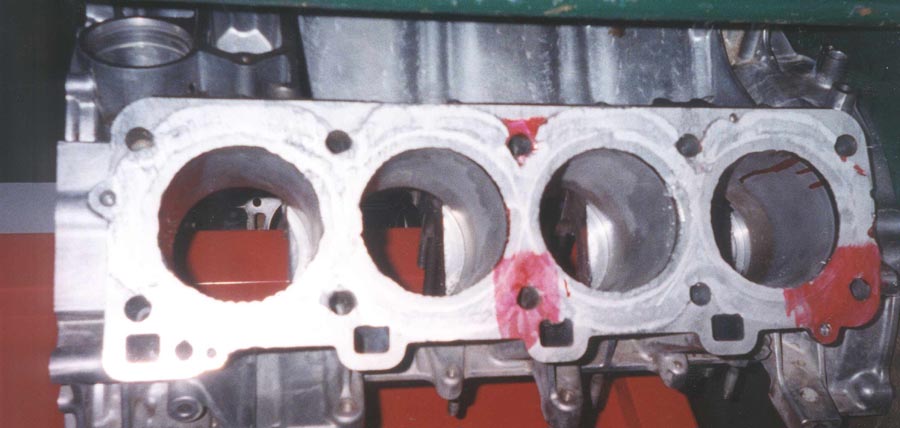
After the deck plates were welded in, the first pass of machining was done. It was determined that there were several low spots marked by the red in the photo below, and these were re-welded, the block was bored and the cast iron sleeves pressed in before the final deck machining pass was made as seen in the second photo below.
I was instructed by James on how to do the mock assembly, as well as grinding the rod clearance required for the block webbing.
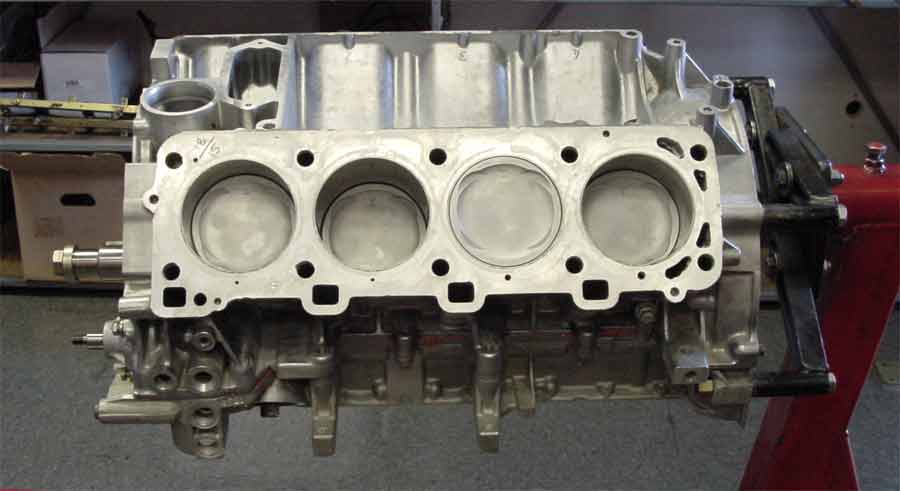
Below you can see the completed short block.
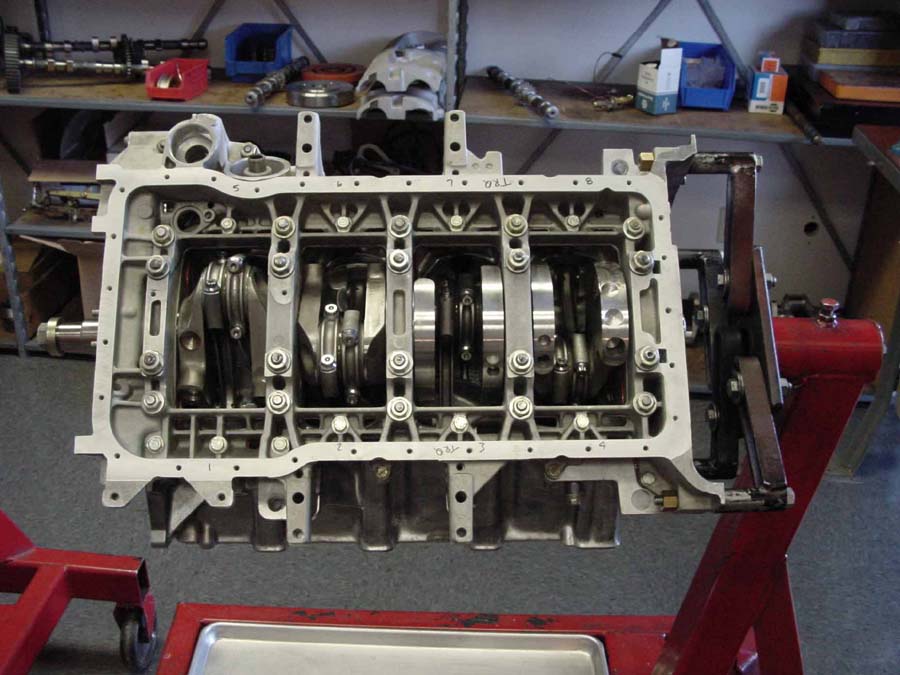
This is from the bottom. If you look on the shelf in the background, you can see the 968 cam covers, along with the modified cams. You can also see the orange factory harmonic balancer against the back wall. In front of it, you can see the aftermarket balancer, that has been modified to fit the stroker crank. We decided to go with the high performance stainless fluid filled balancer, as the factory one had cracks in it with only 70k miles on it. They were really small, and could only be seen after removal and cleaning. This one will definitely outlast a factory one in a higher output engine..
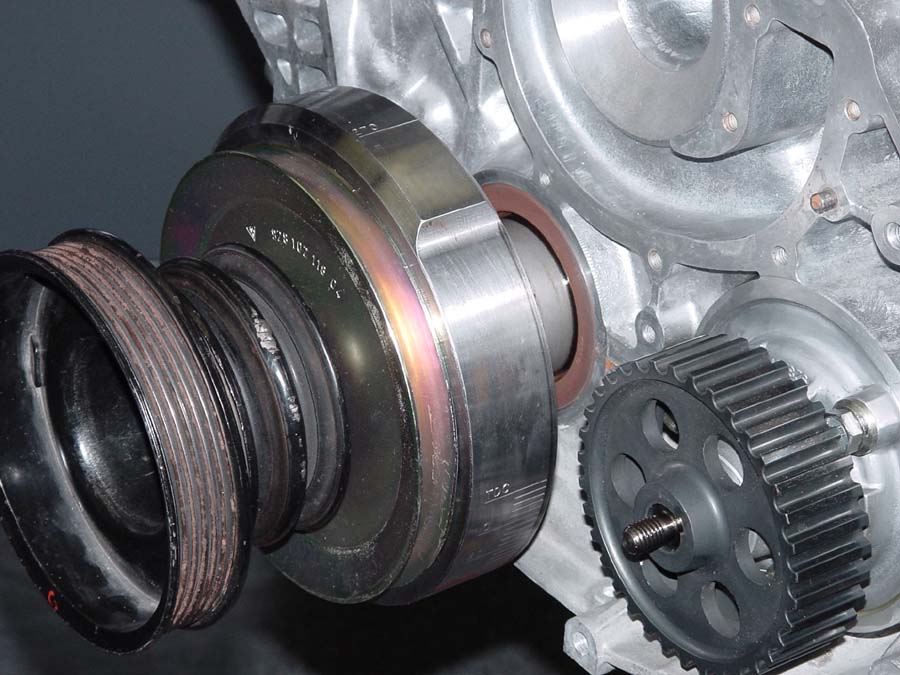
Below is a close up of the balancer on the crankshaft.
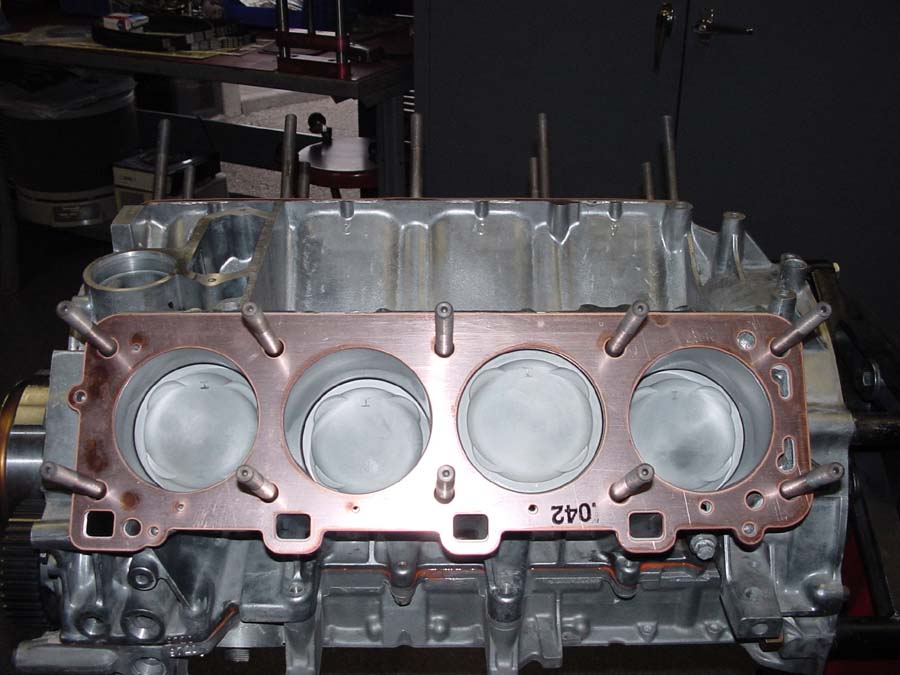
Below are some shots of the block with the custom made head studs, along with the copper head gaskets.

Heads
& VarioCam
![]()
![]()
![]()
![]()
![]()